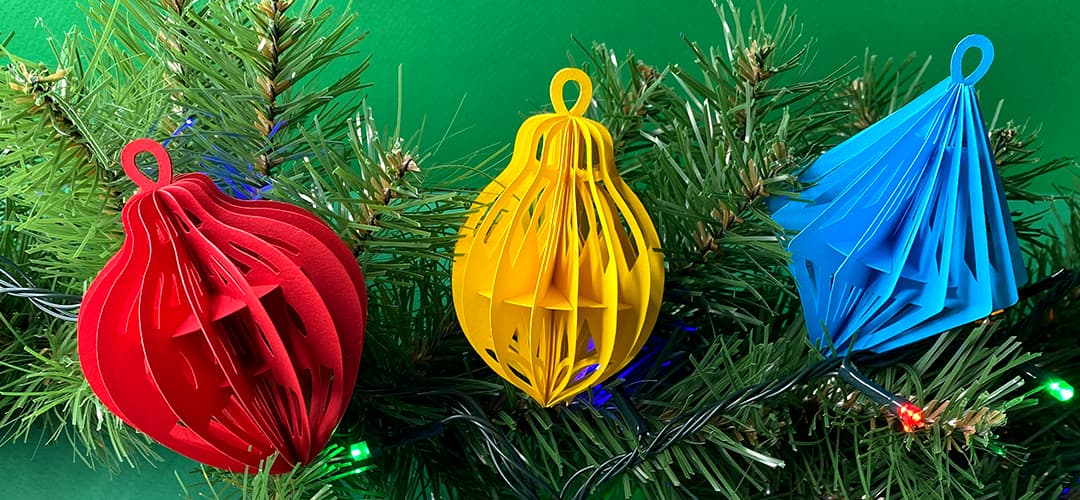
Let’s make a stunning DIY 3D Christmas Ball make with paper in just 5 minutes!
Create a charming and budget-friendly Christmas decor for your festivities. Join us as we guide you through the simple process of transforming paper into an amazing 3D Paper Christmas Balls. Perfect for all skill levels, this project adds a touch of handmade warmth to your holiday celebrations.
Here is a list of the materials and tools I used to make this project
- Cricut Cutting Machine
- Cordless Glue Gun
- StandardGrip Mat
- Cardstock Paper (any color you like)
- Glue
Let’s make 3D Paper Christmas Balls
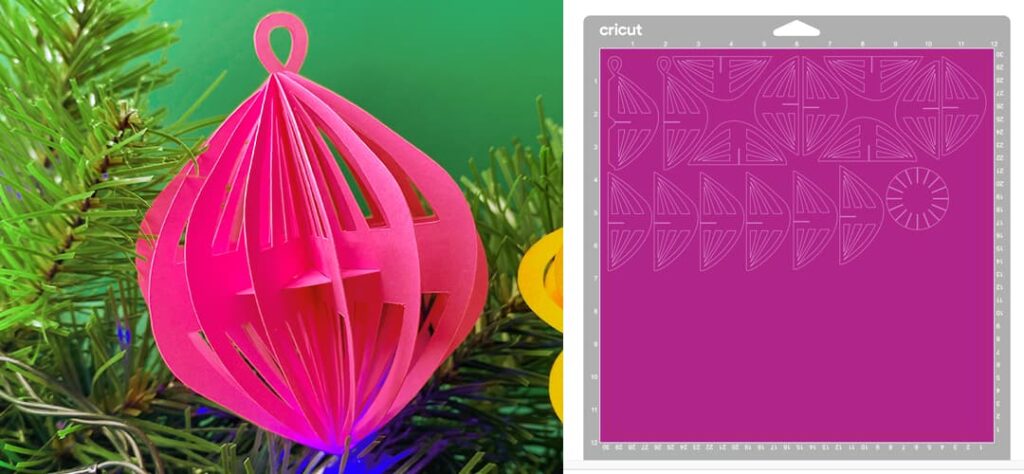
Cut all pieces of the Paper Christmas Ball. We saved your project with recommended size for cutting. You can make them slightly less but we don’t recommend scale down the project too much!
Please, don’t use too thin paper for the project, we recommend to use 59-80 lb (160-215 gsm) cardstock paper.
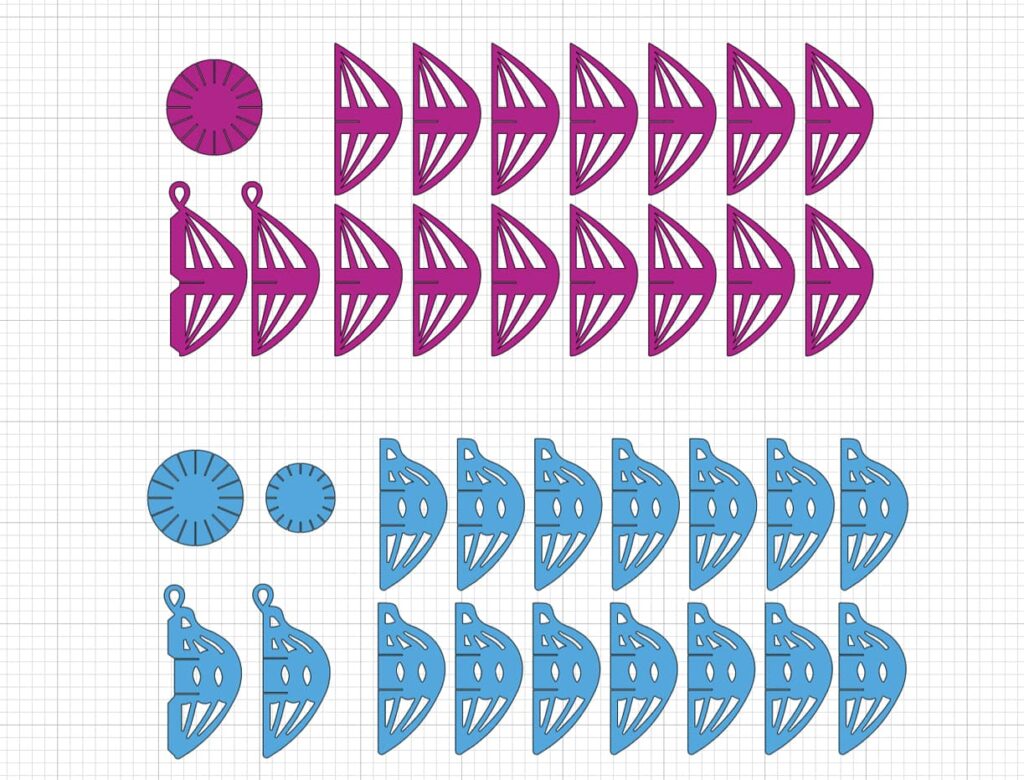
For one Christmas Ball you need to cut 14 simple pieces of ball, 2 pieces with ear and 1 or 2 central part (it depends on shape of the ball)
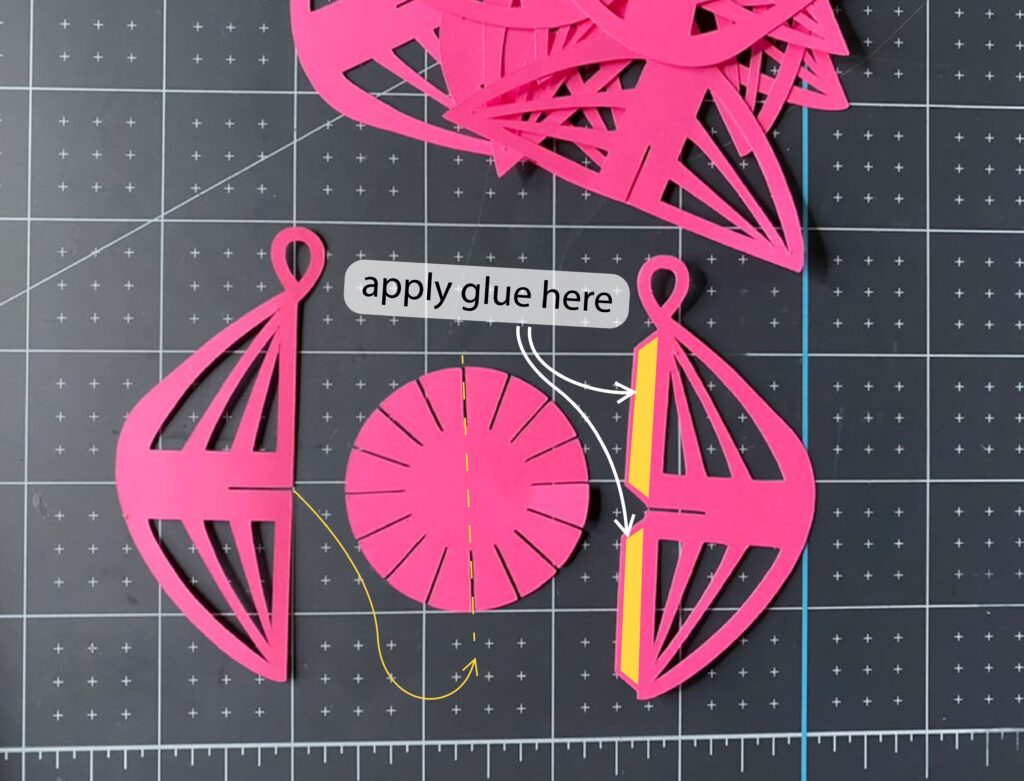
Find center of the circle and connect the grooves of circle and grooves of Christmas ball pieces. Then glue together two pieces with ears.
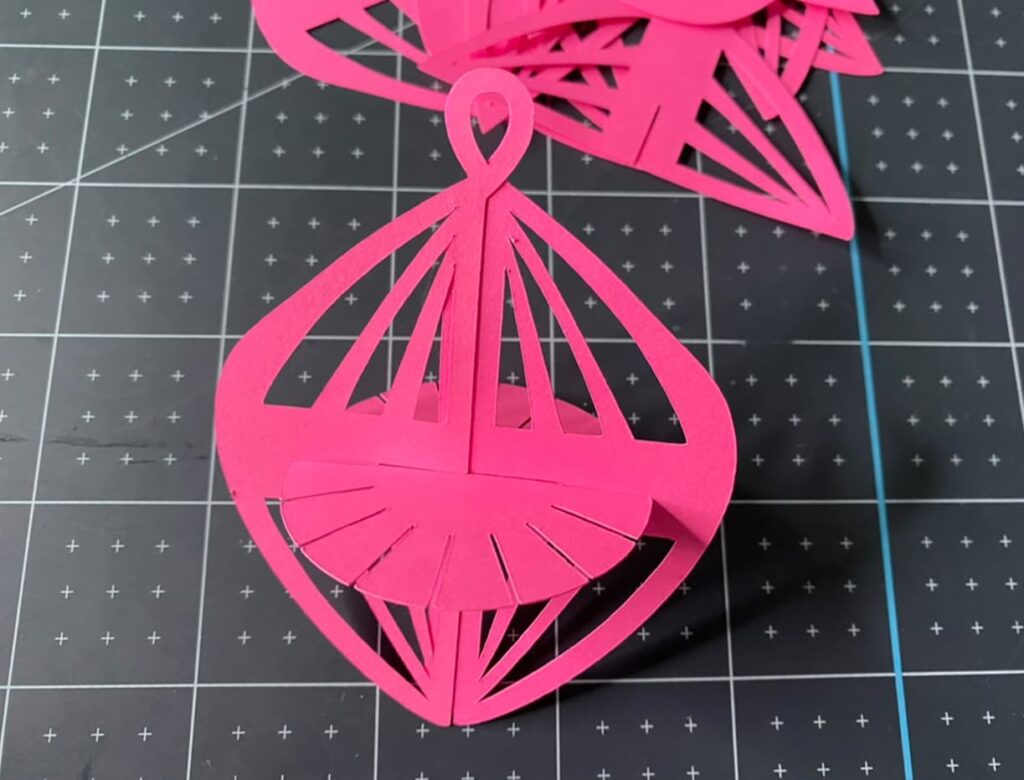
You need to get this result, and by the way the Christmas Ball is almost ready! Insert the remaining 14 pieces of the ball into the grooves of the central circle(s).
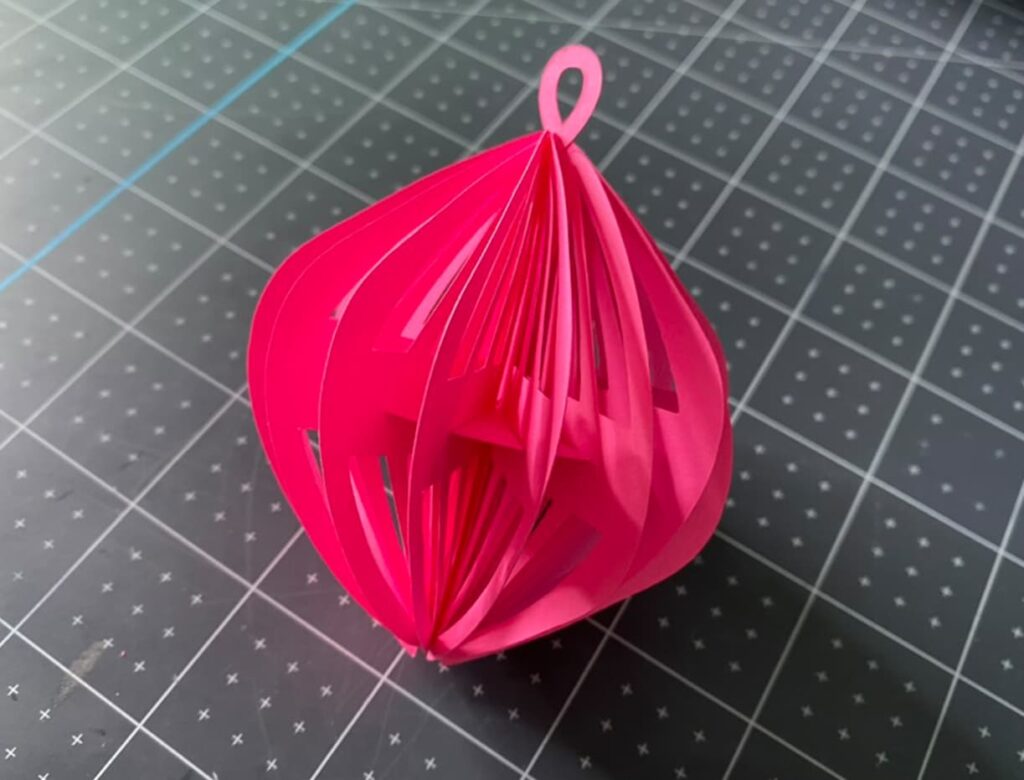
Our DIY Paper Christmas Balls is done!
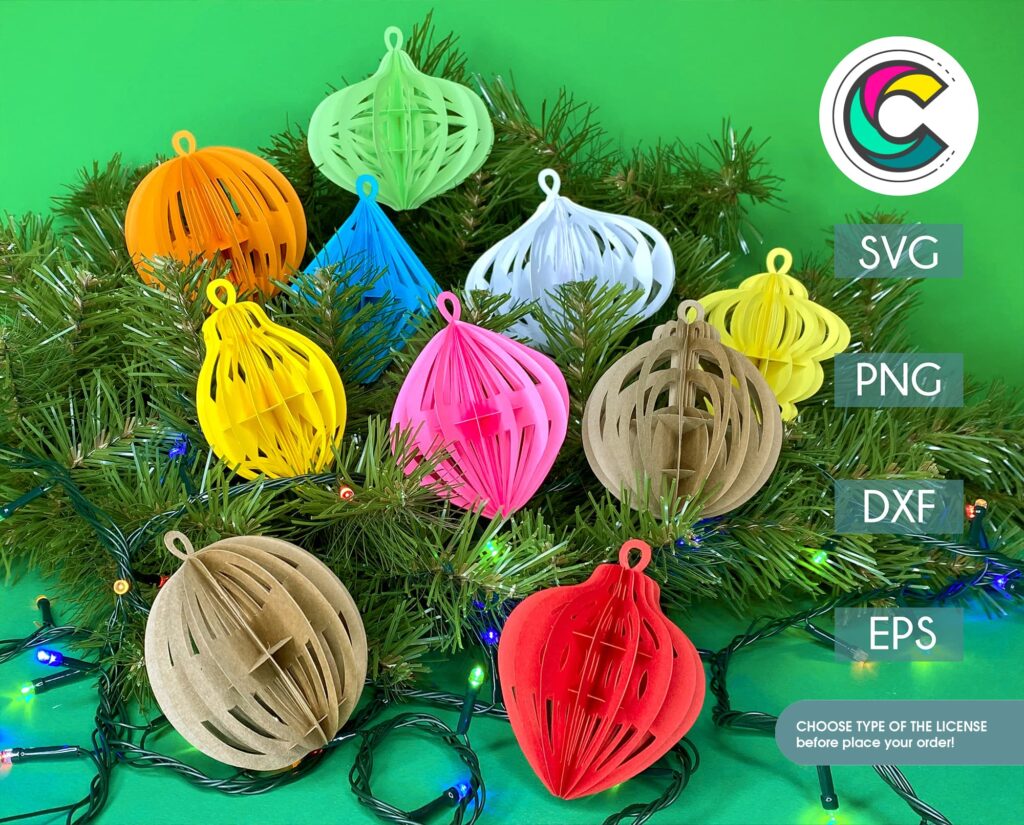
Click on photo bellow to buy DIY Paper Christmas Balls with 10 ball templates!
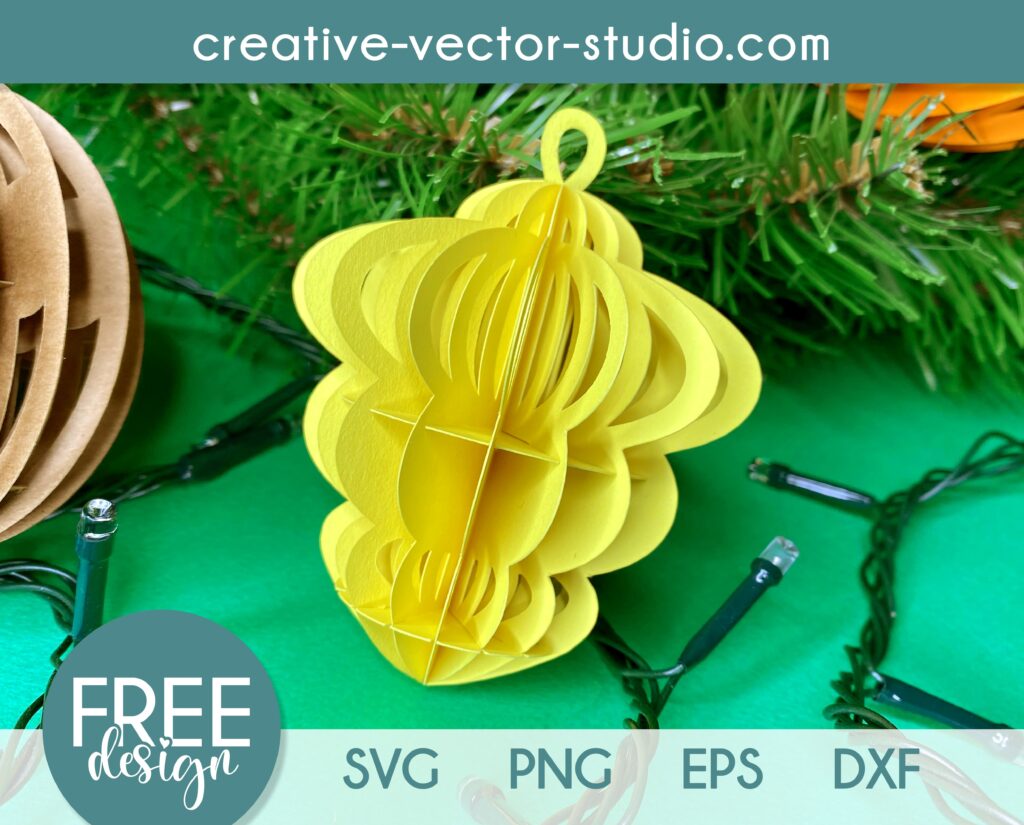
or visit our free category to grab the Free 3D Christmas Ball SVG Template!
Watch our video tutorial below to find out all the details and see the step-by-step process of making the 3D Christmas Balls.
View this post on Instagram
Happy crafting!
Leave a Reply