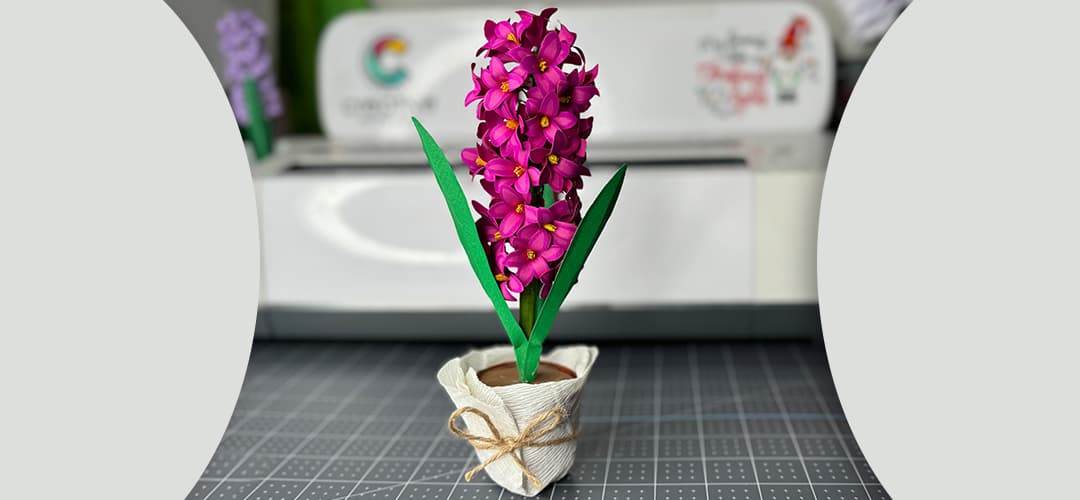
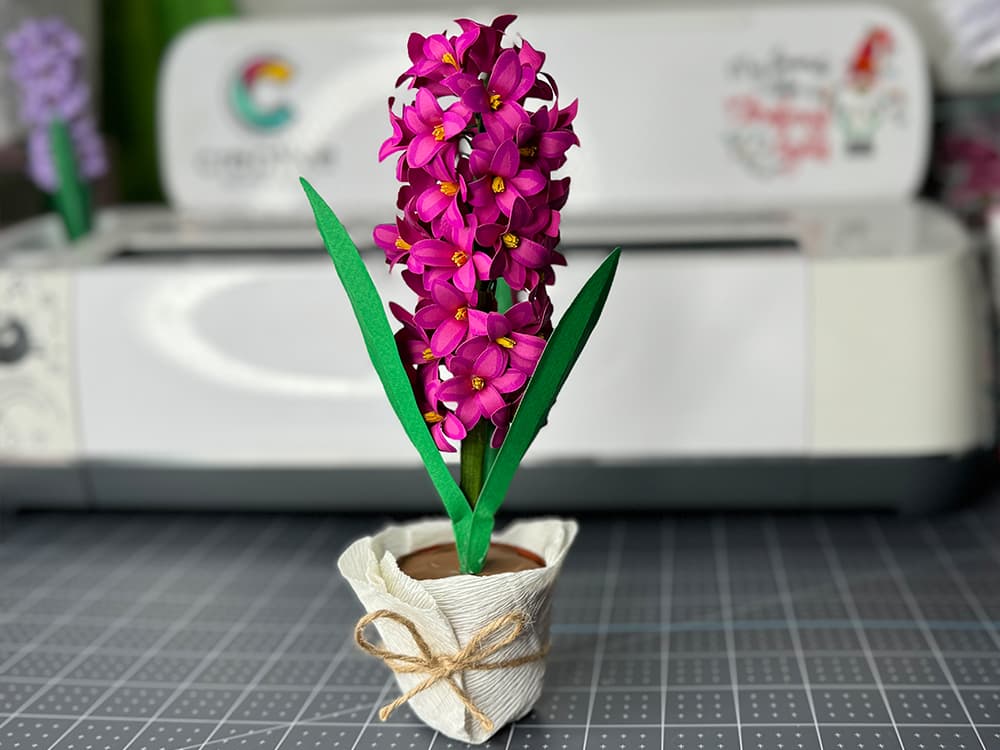
Hey there! Ever wanted to know how to make a lifelike DIY Paper Hyacinth Flower? Well, we’ve got you covered! Head over to Paper Flower Section on our website to grab the template. With our step-by-step instructions, you’ll be a pro in no time. While it’s a simple project, you’ll need a few supplies besides paper. Let’s get crafting together! ✂️
The first thing, you need to decide the way you will cut all the pieces. You can either fire up your cutting machine (I use Cricut Maker) or print out the pieces to cut with scissors.
Then you need to have flower wire, or some wooden stick (later you will find out why), floral tape, glue gun, some flat object for shaping petals (like a ruler, Cricut Scraper).
You’ve got two options for making this flower: the easy way and the more challenging way. But if you choose the difficult route, you’ll end up with a truly lifelike hyacinth flower.
So let’s start our trip with more challenging way!
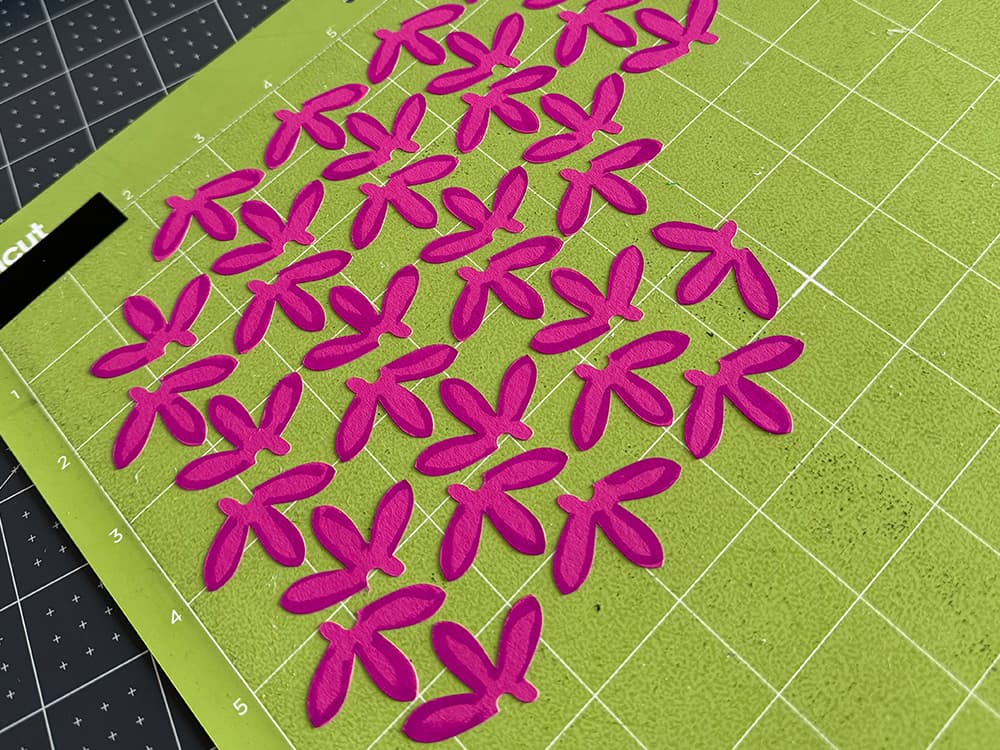
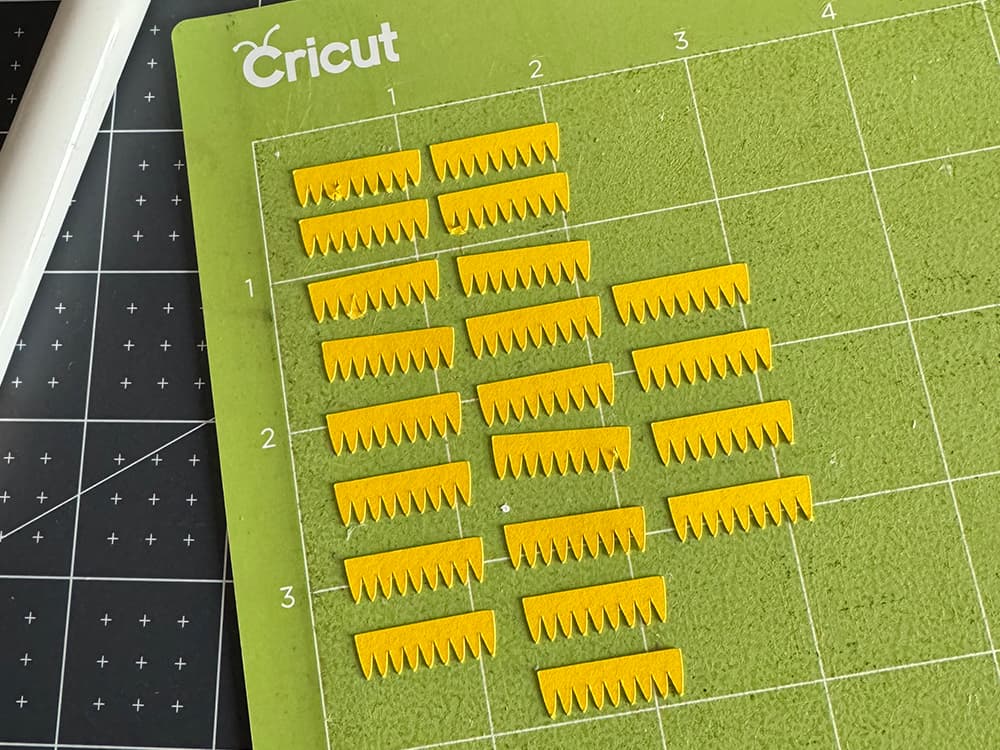
Cut flower centers.
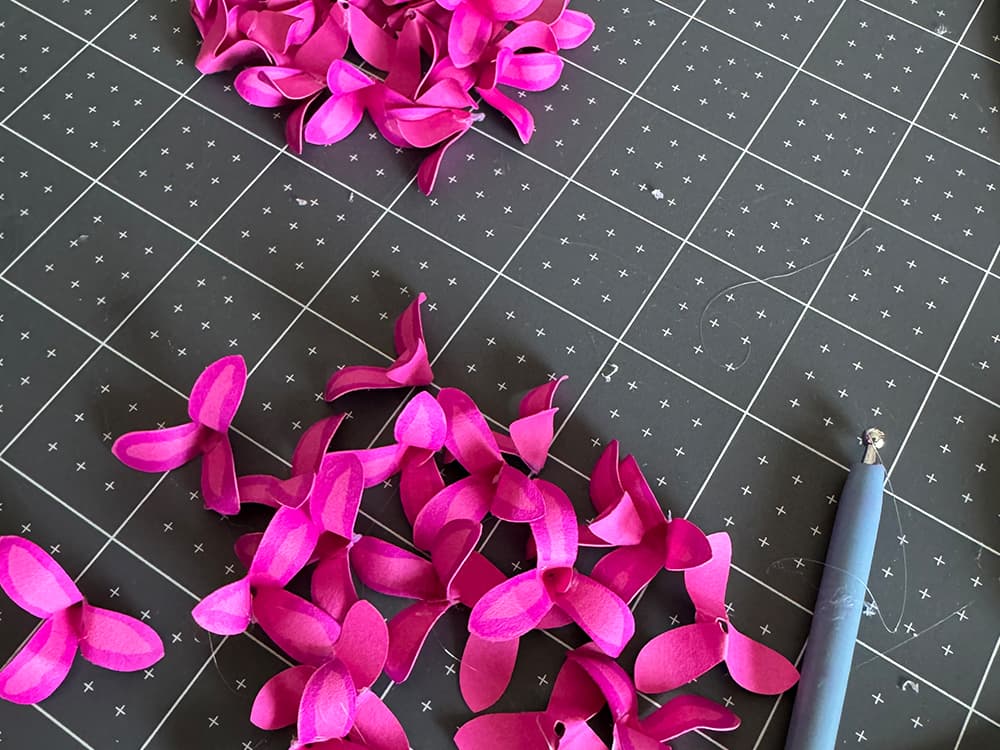
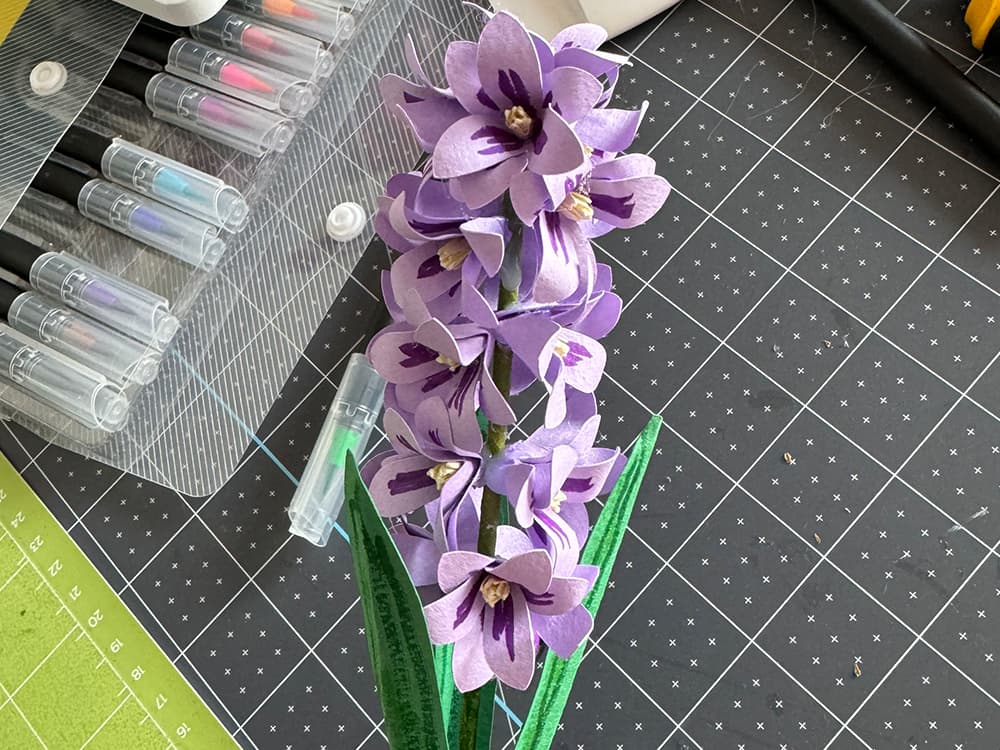
Curl a bit each petals. Watch our video tutorial to find out how I make it. Find the link at the bottom of the article.
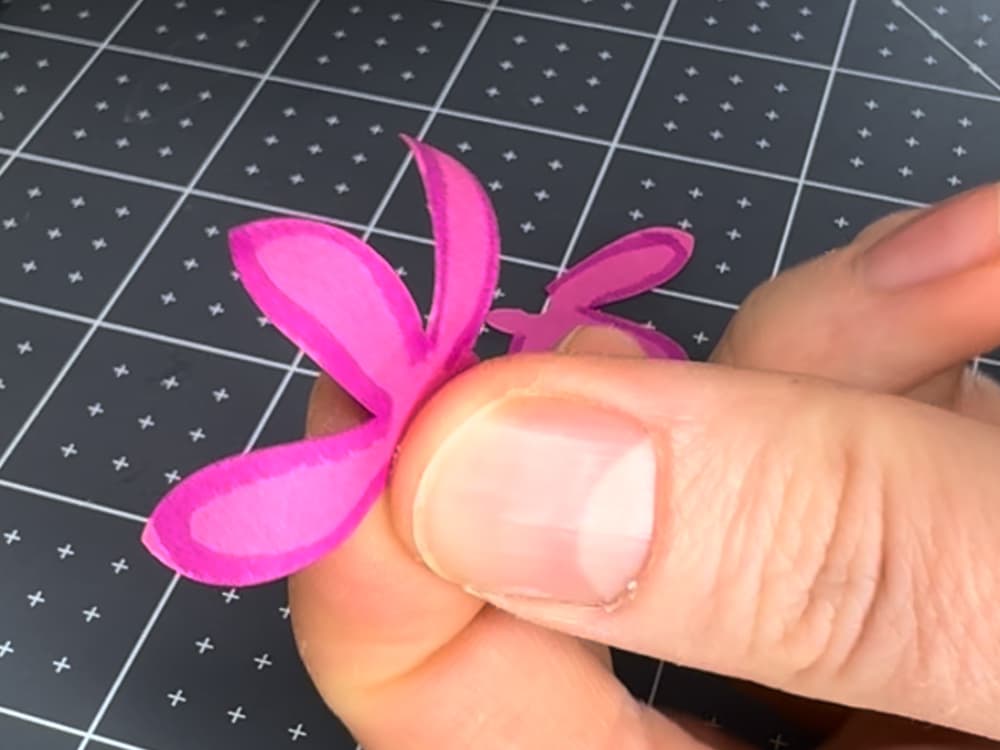
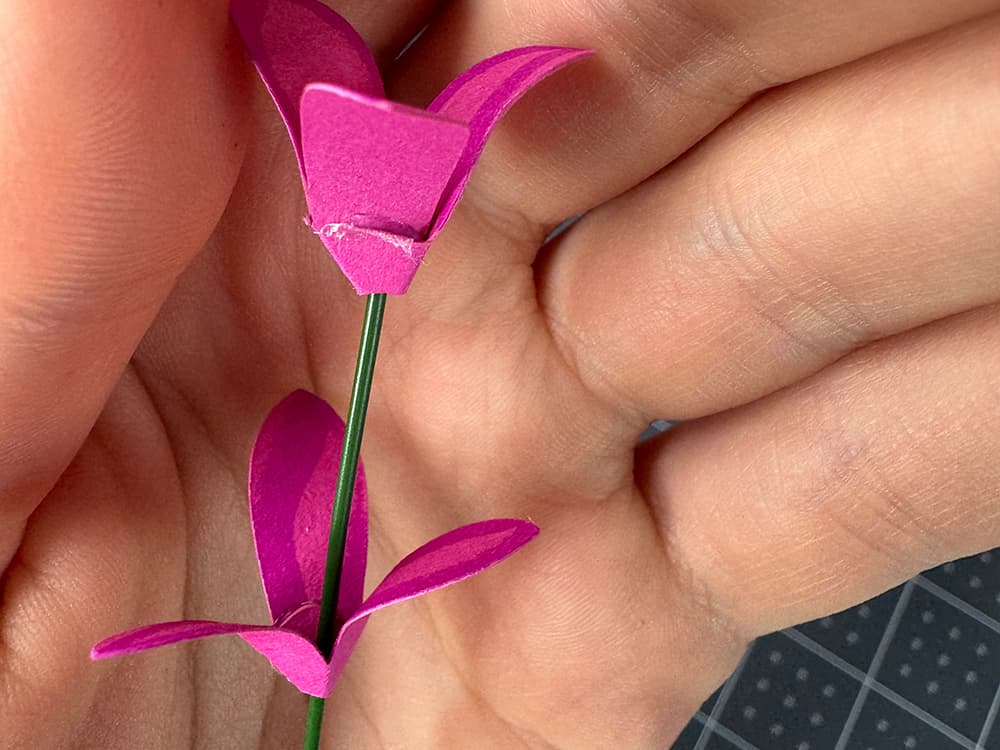
For each flower, you’ll need to make two types of petals. On each petal, you’ll notice three petals and a small “tail” for gluing the flower. Take a peek at the photo below. You’ll see that one piece of the flower is glued so that this “tail” is on the outside, while the other one is on the inside. You might wonder why you need to do this. Well, when you assemble your flower, hiding all the glued spots ensures a beautiful final result.
Glue all the petals of our DIY hyacinth flower.
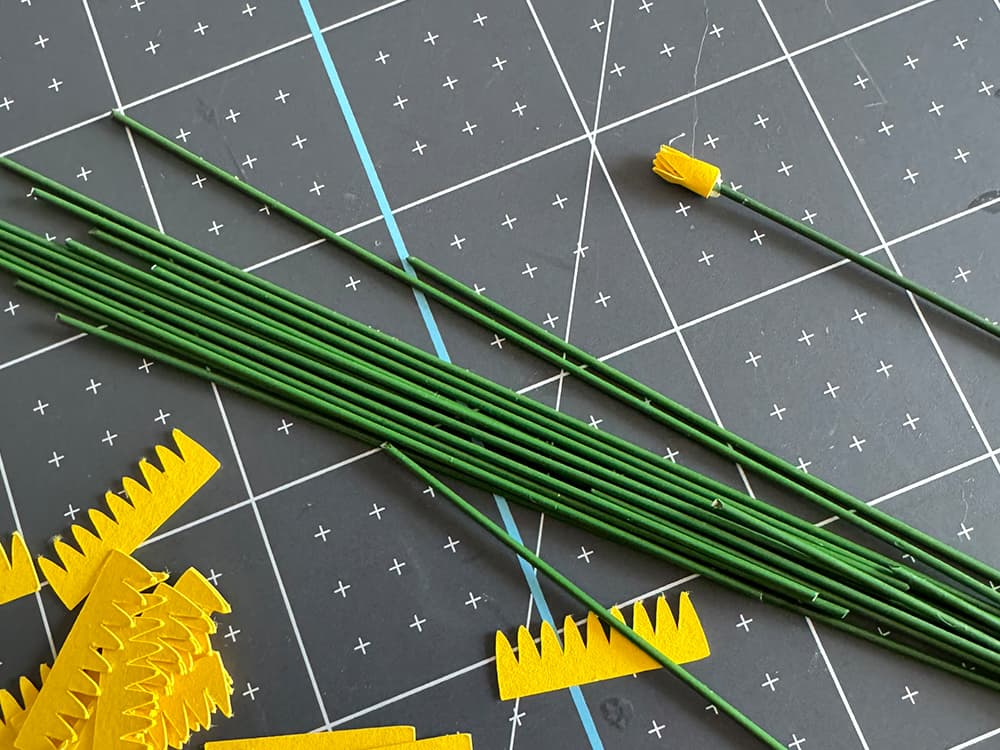
Next, cut flower wire to about 4″ each and glue the flower center to it, as shown in the photo. If you opt for the easier way, you can skip this step altogether. Simply roll all the centers and glue them without using any wire.
Then glue all the flower pieces as I described before.
If you make easy way flower, you need to glue two pieces of the flower together then glue the flower center (without any wire!)
Here’s where the main difference between our two methods comes in.
If you choose the challenging way, you’ll need to shape the flower and connect each small flower using flower wire. Connect them layer by layer to achieve the size and volume of the flower you desire.
If you opt for the other method, simply take a wooden stick (a sushi stick works great), decorate it with green floral tape, and glue the flowers onto it. (I will show simple result at the end of this post).
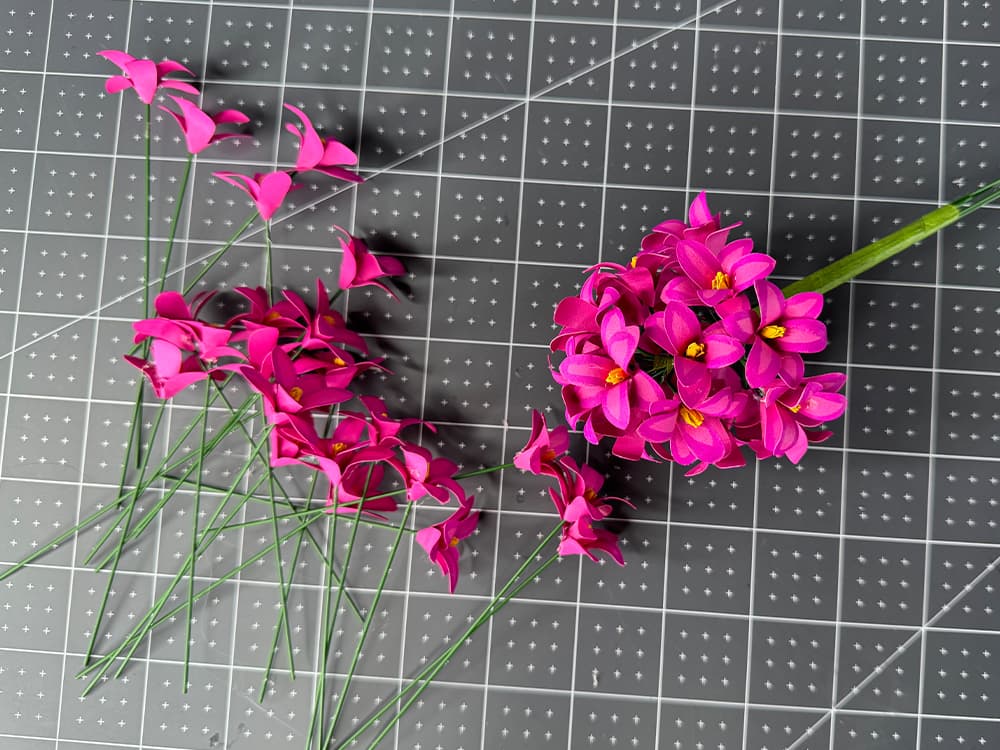
Next, bend each leaf in half and gently curl the edges. Then, glue them to the stem. You can place your hyacinth flower in a pot or simply arrange them in a vase. We are officially done!
As I promised, I show you the result if you will make flower with simple way =)
Hope you liked my post! If you’d like to make this flower too, simply click on the image below to be redirected to the Hyacinth Flower SVG Template.
Leave a Reply